I am an otaku and an avid collector of figures. But beyond that I am also a design engineer. In 2015 I decided that I would try my hand at the art of customer figure making. I was able to complete a customer Jason nendoroid, Deadpool nendoroid, and a Pyramid Head nendoroid within the first year of trying.After those initial customs I realized that my skills were no where near the level of creating high quality customs. So in the second quarter of 2016 I put all my projects on hold and began working on my skills to increase the quality of my customs. A friend of mine commissioned a Pyramid Head nendoroid and in creating the custom I made some improvements and dubbed it V2 of my custom Pyramid Head.
Soon after, I began researching techniques that garage kit builders use in the holy land of Japan, I consider it the holy land because all the anime and figures I like are made there haha. I discovered that my skills and techniques were similar to theirs but with two major differences. One, they all had some type of machine that aided them in making high quality parts; and two, they all were using high quality molding materials that produced high quality casts, whereas I was doing everything by hand and using sub-par molding materials. After watching the professionals at work I set out to follow in their footsteps. A task that would prove to be much harder than I anticipated.
To being with I bought a small airbrush to help with painting. I realized that painting everything by hand would make too thick of a layer of paint which would make fitting parts together difficult and possibly damage the paint job that I just finished while putting the parts together. Of course I had never airbrushed before so I had to watch more videos and began practicing techniques using the airbrush. Needless to say it took me quite sometime to get a good technique down. But after a couple of weeks I finally got to a point I was comfortable with. Not perfect, but as I continue to make figures my technique is bound to improve.
Next step was creating high quality casts. I realized that the alumilite remelt mold material wasn’t adequate enough to create flawless casts. Every part I made using the remelt mold material always came out with micro bubbles and always needed to be completely sanded down and filled using some type of putty filler. So I began making molds using the smooth-on molding material and at first it worked out pretty well, but after time I started to run into all sorts of hiccups and the quality of the molds began to go downhill quickly. So needless to say I tried another brand of molding material that had a 10:1 mixing ratio vs the 1:1 mixing ratio that smooth-on had. I also invested in two other tools that would aid in making high quality molds, and those were a single action vacuum pump and a 2 liter vacuum chamber. I’ve never used a vacuum pump or a vacuum chamber before, so I watched more videos to learn how to use them properly, can you see a trend forming? :p The 10:1 molding material in the vacuum chamber degassed, de-aired, way easier than I was expecting and poured incredibly well. So at last I was able to make high quality molds. After all that research and testing we are now at the end of 2016.
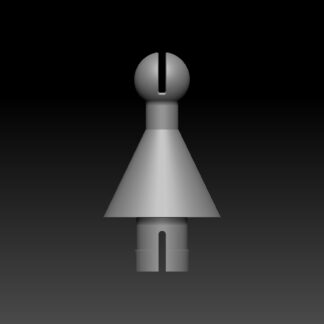
During my mold trials and errors I began looking into getting a 3D printer because I realized early on that there are going to be parts that will be extremely difficult for me to make by hand. So I got my hands on the monoprice mini 3D printer. After getting it setup and calibrated I started printing random test parts so I can get it honed in and get 3D prints that I was happy with. After a couple of hours of tinkering I was set to print my own designs. The first couple of designs I printed were all focused on mold boxes and making them all consistent when it came to the length and width. After a few dozen designs and prints, I finally settled on a mold box design that was easy to print and was stackable, which allowed me to leave the poured mold in the mold box until it was completely finished.
After months of trial, error, and testing I was finally able to begin working on a new design. The design in question is my custom Rachnera nendoroid! With the added ability to print up my own designs, it dawned on me that I can now pursue making rather complex nendoroids of my very own. I couldn’t think of a better choice than Rachnera herself. :3
After two long years of practicing, researching, and developing I am glad to say that I have decided to start up my own small figure company.
Blue Inferno Figures is my brain child after everything I’ve learned. I want to provide people with the highest quality figures that a lone person can produce. Rachnera will be my official first release. My small figure company will keep everything in house, including package design. I haven’t quite learned how to make custom packages and what machines or tools I’ll need, but I won’t let the unknown deter me from learning and giving it a try. 😀
The goal of Blue Inferno Figures is to provide high quality figures along with the highest possible customer service.
Now for some more personal stuff about me.
I mentioned that I was an otaku and avid collector, but I’m not quite sure that explained it well enough. I started collecting figures back in 2010 and since then my collection has grown, but it didn’t start gaining speed until about 2013. That’s when I found the joys of nendoroids. I was captivated at how cute they were and what astounded me was that the figure was posable and contained multiple parts to change how the figure looked. I know figmas are capable of doing this too, but I like the whole chibi look personally. Not saying that I don’t have any figmas, because I do. :p Needless to say, my nendoroid collection has grown to what I think is an impressive size. After Good Smile Company released the blank face plates is when I thought how awesome it was to be able to draw my own expressions. From that thought grew my fascination on making custom nendoroids.
I hope you enjoyed reading a little about me and the small figure company.