In this post I will be going over the basic tools required for making a simple nendoroid add-on.
In the image below are all the basic tools you will need when making a custom nendoroid. Some of you might be asking “why aren’t there any paint brushes or paints in the picture?” and the answer is simple. I haven’t gotten to that section yet. haha But I’ll be happy to list all the parts for you just in case you are unable to read the text clearly. 🙂
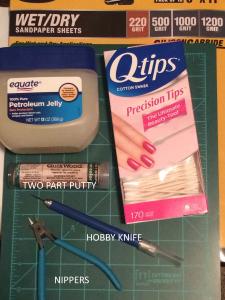
- Petroleum Jelly
- Q-tips
- Two part putty (the brand I use is Quikwood)
- Hobby knife (the blade can be whichever blade you feel more comfortable working with)
- Nippers (this is mostly used for cutting sprues off of model kits, but it doesn’t hurt to have some handy)
- Sandpaper sheets (1000, 1200 are the ones I find myself using more than anything. So you can forgo the 220 and 500 unless you need to take a large amount of material off. Then go for the 500.)
- Cutting mat (I can’t stress this enough. Get yourself a cutting mat if you are going to be cutting anything with the hobby knife. I’ve learned first hand to always use a cutting mat when using the hobby knife. ;3;)
Now the following images will show you step by step when adding putty to your nendoroid.
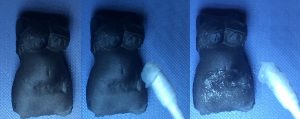
Here we have a spare body for my custom Rachnera nendorid that I will use for this tutorial. First I get a little bit of jelly on a Q-tip and spread it over the area I do not want the two part putty to fuse with. If you do not coat the part with some sort of release, jelly, then the part and the putty will fuse together and you’ll have to break the putty off to separate the two and in doing so you may damage the figure you are working with.
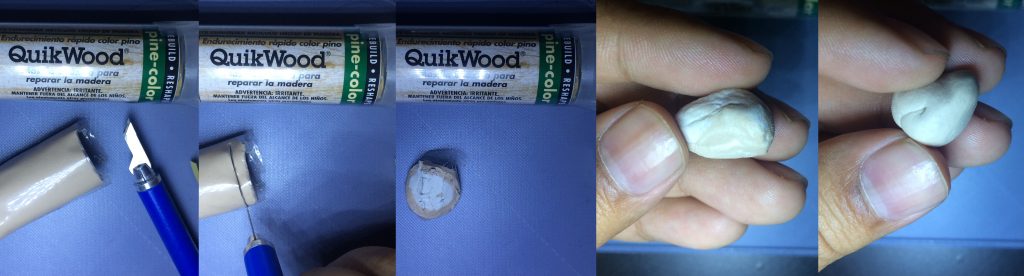
Here I am cutting the two part putty directly across using my hobby knife. After I cut the putty I place my putty back in its tube because if the putty is exposed to the air then it will start to harden by itself and then you’ll have to get more. So it’s good to keep that in mind after you cut the right amount you need. Now for mixing the putty you will want to kneed it for about two minutes. If the putty has streaks in it still then you will want to continue kneading it until it’s a uniform color. Once it’s uniform then you can start forming it into the shape you want it to be in and place it on your nendoroid.
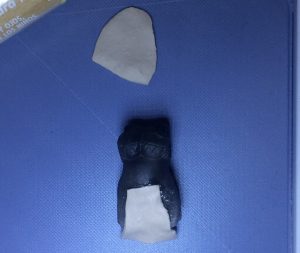
For me I’m making a small loin cloth. I used too much. ;_; (Side note: if you don’t like your hands to be a little sticky after kneading the two part putty then you can wear some gloves to help with this small inconvenience. :3
Now it may take a little while for the two part putty to harden, this will depend on the “cure” time for the specific putty that you use and how how thick the part is that you are making. So I would suggest letting the part cure over night so you don’t accidentally mess up what you’ve created, although if you’re going to sand it down and get it looking more like what you want then touching it to check if it’s cured won’t do much harm.

Now with the part fully cured you can remove it from the part like so. It should come off with ease, if you need to remove it that is. In the next image I’m showing an example of the putty that will not be removed. The only way I can remove it is by force and it might damage the main part. Now for the reshaping you will be using the sandpaper to reshape it into the shape you want it to be in. In my example I was close to the finished shape that I wanted so it doesn’t look like much modification.
So that is it for the beginner coarse. I don’t really know how useful it is for the beginners, but I hope it helps give you a direction to follow. :3
Stay tuned for more tutorials in the future. ^_^