This tutorial is to help people wanting to make spare parts to mod for their custom nendos. The following is a list of materials you will need to make a two part mold. (two part molds tend to be the most common of molds when making duplicates for modding)
Two part silicone mold (1:1, 10:1, 100:3)
Mold release
Sulfur free clay
Clay tools
Cardboard (for making mold box), or you can use legos or just about anything that will give you straight edges
Plastic rods (for making channels)
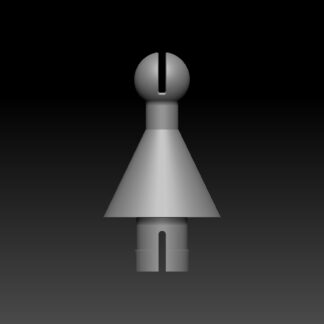
Nendo part
So that’s just about everything you will need to make a two part mold. I will be showing how I make a mold from scratch.
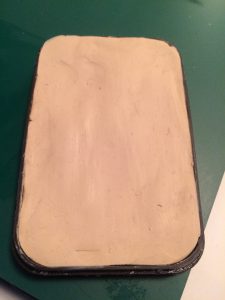 First I get the base of my mold box and put down a layer of clay in the base of the mold box. This will help keep the silicone from seeping out from the bottom and will serve as the parting line for the parts.
 Next I will place the parts I want to copy into the clay and carve out a rough shape of the parts I want to use. I do this so that my part sits about half way in the clay.
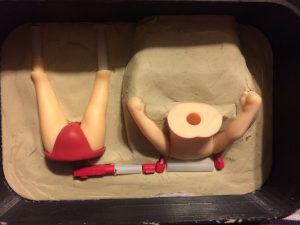
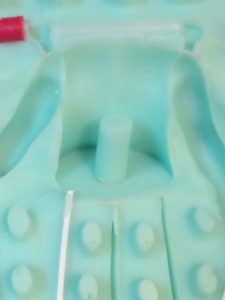
Here you can see my parts are about half way in the clay and I used the clay tools to push the clay up next to the parts. This will create a crisp seam line when pouring your parts later on. As you can also tell I angled up the body so that when I pour my silicone it will go down into the peg hole. This will save me tons of time when the parts are casted. But since I angled the body up like that I had to put more clay under the arms to make that seam line look better. With my parts placed in the clay I can now create locating keys along with vent channels.
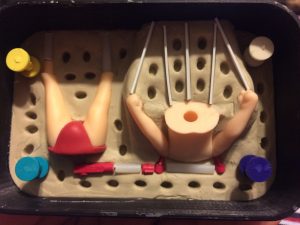 Here I added simple holes, mold pegs, and vent channels. You can use or make any kind of locating keys you wish in this step. As for the vent channels you will want to think of how the resin will be poured and where all the high spots are in your mold. As you can see from my mold I placed a vent channel in the arms and three coming from the main body. This will ensure a lower possibility for air bubbles being trapped while pouring. And if after the first pour you discover an air pocket than you can simply widen up the vent channel to allow the air to escape the mold. Now that your base is is complete you can now bring your mold box up. This may differ from my mold to your mold, but the concept is basically the same. You will want to cover up all the parting lines with either hot glue or clay. That way silicone doesn’t leak from your mold.
Next I will pour the silicone over the mold I have prepared. Here you will want to look at the “pot life” of your silicone to ensure that you have enough time to pour your entire mold before it begins to cure. I also found that the more viscous your silicone is the easier it is to pour and have less air bubbles after the silicone is cured. If you have a vacuum chamber handy than degassing your silicone will remove a lot of the air bubbles trapped in your silicone and give you a more solid mold. However, if you do not have a vacuum chamber than it’s not the end of the world. Degassing your silicone is only needed if you plan to put that mold into a pressure pot while casting. It’s also good practice to pour from the lowest point in your mold and let it rise and creep over your parts naturally. Now that you have poured the first half of your mold you can spend a little bit of time and pop all the air bubbles that rise to the top of your mold. You can kind of tell where they will be coming up most of the time because you will see a small bulge on the surface of the silicone. You can help speed up its rise by gently blowing on the area where the bubble is and once you can see it more you can pop the air bubble with a fine point, like a paper clip tip.
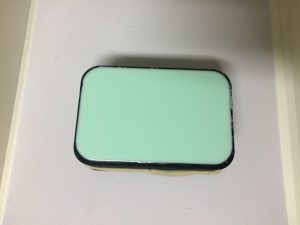 This is what my mold looks like. Not very exciting I know. haha
With the first half of your mold poured all you can do now is wait for it to completely cure. This will vary depending on the silicone you use. So I would consult your brand and look for “demold time”. This means that only after that amount of time has passed will you be able to demold your part from the silicone. My particular silicone that I’m using cures in about 1-1/2 hrs to 2 hours.
Once your silicone is fully cured you can now move onto the second half of your mold. xD
First carefully break down your mold box. Depending on how you built your mold box it might be easier than others. With your mold box removed you may now begin by removing the clay from the mold. You will want to be careful while removing the clay, because you do not want to disturb the part and accidentally remove the part from the mold. Removing the part from the mold will make it hard to get a good mold afterward. So I can’t stress enough on being careful when removing the clay. With all the clay removed you will want to clean your mold. Removing any residue the clay might have left on your parts and on the mold.
With the mold cleaned up you can now begin with the second half of the mold.
First you will want to apply a mold release to the mold. This will prevent your second pour to fuse with the first half of the mold, because silicone will bond to itself without some kind of barrier or releasing agent to keep that from happening. When using the mold release be sure to spray a thin layer and no more. You only really need a thin layer to keep the molds from fusing together. With that said the second pour will be just like before. Build your mold box, seal off mold box to prevent leaks, pour silicone at lowest point, pop any air bubbles that rise to surface, and let silicone to cure.
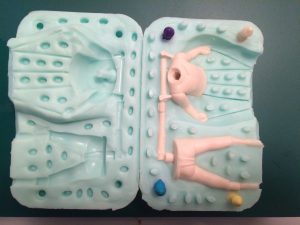
The image below is my mold that I made taken apart.
 As you can see this mold will require little clean up and will be ready to create casts in no time.
 Here I’m trying to show you how well the peg hole turned out for the base of the body.
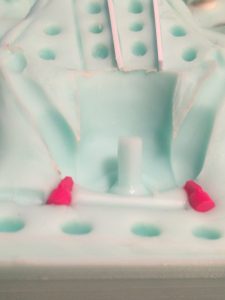
And here I’m trying to show you how well the peg hole for the neck joint came out.
You can also see the level of detail the mold was able to capture in the previous pictures. x3
With both halves of the molds done you may now do a little clean up of the molds. For example, opening up any vent holes that might have been sealed off with silicone, or connect channels so resin will flow freely though all the connected resin channels, or even more important connect the vent channels to the parts. If the vent channels are not properly opened up than air will have difficulty escaping the mold.
Here is my first test pour using the mold I just made.
*the vent channels on the upper body were removed by accident while I was pulling off the resin that was on the top of the mold, which is why it’s not in the image. ;.;*
As you can see from the image below it only requires cutting off the channels and very little clean up to make it a decent replica to be used for anything I desire.
*Image of the parts before clean up*
Here’s the replicated part next to the original. x3c
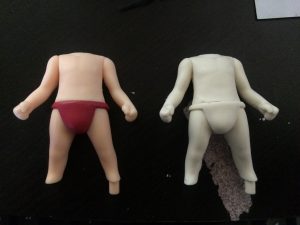
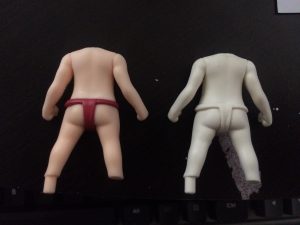
This tutorial was mostly centered around making the mold and not pouring the resin. Just thought I would point that out to prevent people from saying I didn’t go over the resin pouring steps. lolol